A NFT (Non-Fungible Token) marketplace is a digital platform that allows users to buy and sell NFTs. NFTs are unique digital assets that are stored on a blockchain, providing proof of ownership and authenticity. NFT marketplaces provide a platform for artists, collectors, and investors to showcase and trade their digital assets, including digital art, music, videos, and other digital goods.
In this guide, we will show you how to build your own NFT marketplace on a Cardano blockchain. With Mesh, we provide you with a ready-made marketplace starter kit that you can customize to your needs.
Live demoInstall starter kit
To begin, you can use Mesh CLI to get the marketplace starter kit by running the following command:
npx create-mesh-app my-marketplace -t marketplace -s next -l ts
Or clone from our GitHub repository.
Next you need to install the dependencies by running the following command in the project directory:
yarn install
Setup MongoDB
What is MongoDB?
MongoDB is a popular, open-source, document-oriented database management system. It is designed to store and manage large volumes of unstructured or semi-structured data, such as JSON documents, and provides high performance and scalability.
Unlike traditional relational databases, MongoDB stores data in flexible, JSON-like documents with dynamic schemas, which makes it easier to represent complex hierarchical relationships and evolving data structures.
Create MongoDB Atlas Account
The easiest way to get started with MongoDB is by using the Atlas developer data platform. A free tier is available with basic database functionalities. This free tier is more than enough for the purposes of this tutorial. Register a free Atlas account with your email address (no credit card required).
Deploy your first cluster
Once you have created your account, you will be redirected to the Atlas UI where you can create your first cluster. Give your cluster a name and select the region where you want to deploy it. For this article, we will use the free tier cluster.
Atlas free clusters provide a small-scale development environment to host your data. Free clusters never expire, and provide access to a subset of Atlas features and functionality. Paid clusters provide full access to Atlas features, configuration options, and operational capabilities. For production throughput and richer metrics, you can upgrade to a dedicated cluster at any time. For more information on deployment instructions, see official documentation on deploy free tier cluster and create new cluster.

Add Your Connection IP Address to Your IP Access List
You must add your IP address to the IP access list before you can connect to your cluster. You can add 0.0.0.0/0 to access from any IP address (not recommended for production).
An IP is a unique numeric identifier for a device connecting to a network. In Atlas, you can only connect to a cluster from a trusted IP address. Within Atlas, you can create a list of trusted IP addresses, referred to as a IP access list, that can be used to connect to your cluster and access your data. For more information on adding your connection IP address instructions, see official documentation.
Configure your .env.local file
Once you have created a cluster, you can connect to it using a connection string. A connection string is a string of characters that contains the information required to connect to a MongoDB deployment. For more information on connecting to your app, see driver-connection.
- Click Database in the top-left corner of Atlas.
- In the Database Deployments view, click
Connectfor the database deployment to which you want to connect. - Select
Connect your application - Copy your
connection string, it should look like this:mongodb+srv://jingles:<password>@mesh.meshsdk.mongodb.net/?retryWrites=true&w=majority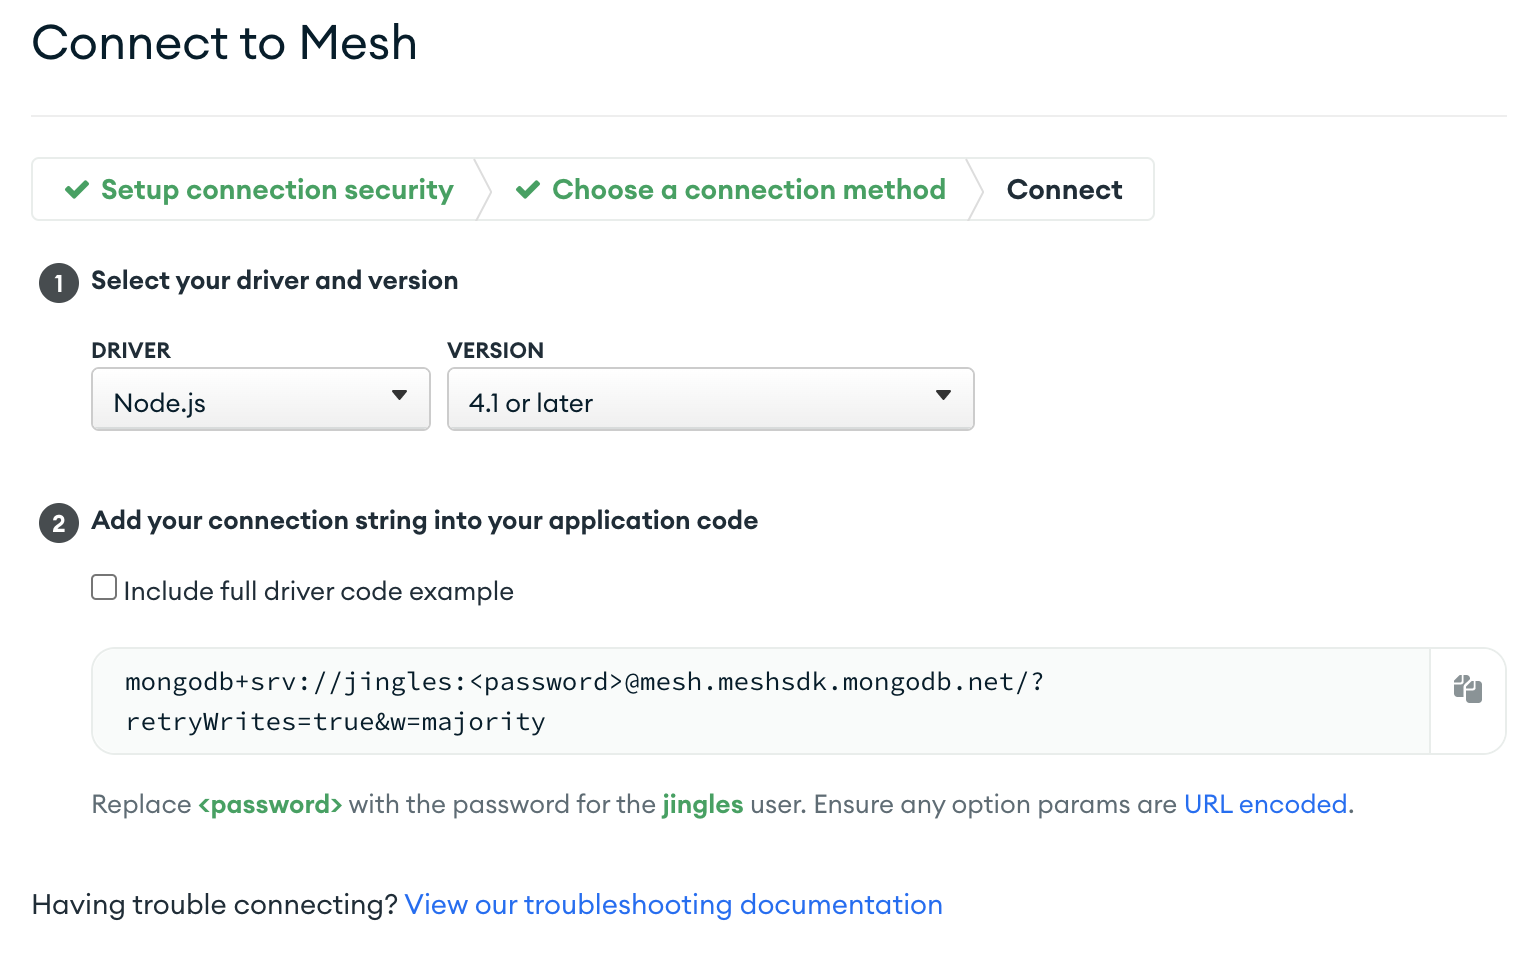
- Go to your project folder, and rename
.env.local.exampleto.env.local - Paste your
connection stringin theMONGODB_URIfield in your.env.localfile - Replace
<password>with the password you have created for your database - Copy the name you have created for your database in the
MONGODB_DBNAMEfield in your.env.localfile
Once the dependencies are installed and the environment variables are in place, you can start the development server by running the following command:
yarn dev
Customize Marketplace
Open the file lib/marketplace.ts, you will see the following code:
const marketplace = new BasicMarketplace({
  fetcher: blockchainProvider,
  initiator: wallet,
  network: "preprod",
  signer: wallet,
  submitter: blockchainProvider,
  percentage: 25000, // 2.5%
  owner: "addr_test1vpvx0sacufuypa2k4sngk7q40zc5c4npl337uusdh64kv0c7e4cxr",
});
Lets go through what each of these options mean:
- fetcher: Using one of our blockchain providers, we use the fetcher to query for the locked UTxO.
- initiator: For starters, this is the connected user's wallet.
- network: It has to be one of the following values:
"testnet" | "preview" | "preprod" | "mainnet". - signer: For starters, this is the connected user's wallet.
- submitter: use one of our blockchain providers, we use the submitter to submit the transaction.
- percentage: The percentage of the sale price that the marketplace
ownerwill take. Note that, the fee numerator is in the order of millions, for example3000implies a fee of3000/1_000_000(or0.003) implies a fee of0.3%. - owner: The wallet address of the marketplace owner which will receive the marketplace fee.
There are 4 actions (or endpoints) available to interact with this smart contract:
- list asset
- buy asset
- updating listing
- cancel listing
Do visit the marketplace endpoints documentation and live demo to learn more about these actions.